
Creating handmade fishing lures can be a rewarding hobby that combines creativity, craftsmanship, and practical utility. Unlike store-bought lures, handmade versions allow you to tailor every detail—from shape and size to color and action—to match local fish species and conditions. Best of all, when a fish bites something you made with your own hands, the satisfaction is unmatched. Here’s how to get started and actually make lures that catch fish customized fishing lures.
1. Understand Your Target Species
Before diving into lure making, you need to understand the fish you're trying to catch. Different species respond to different colors, sizes, shapes, and movement patterns. For instance, bass often go after crankbaits and spinnerbaits, while trout might prefer spinners or small soft plastics. Do a bit of research on your target species’ habits, the local water conditions, and the baitfish present in your area.
2. Choose a Lure Type
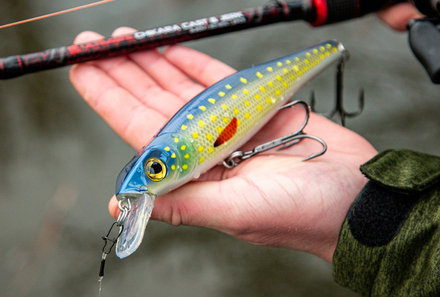
There are several types of lures you can make by hand: hard baits (like crankbaits), soft plastics (like worms and grubs), jigs, spinners, and even topwater poppers. If you're just starting out, wooden or plastic crankbaits and simple jigs are good beginner projects. They don’t require too much gear and can be highly effective when fished properly.
3. Gather Materials and Tools
For hard baits, you'll need wood (basswood and balsa are common), a carving knife, sandpaper, drill, and waterproof paint. Add split rings, treble hooks, and screw eyes for hardware. For soft plastics, you'll need molds, plastisol (a liquid plastic), coloring agents, and an injector. Always wear safety gear, especially when working with sharp tools or hot liquids.
4. Design and Shape the Lure
Sketch your lure first. Consider the profile, swimming action, and size. Carve the basic shape using a knife or small rotary tool. Smooth it out with sandpaper, and ensure it’s balanced so it swims naturally. Test the buoyancy—some lures need to float, others to sink slowly or suspend.
5. Paint and Seal the Lure
Once shaped, you can paint your lure using airbrush or hand-painting techniques. Use realistic patterns, or go for bold colors depending on your target species. After painting, seal the lure with a clear, waterproof finish like epoxy or polyurethane. This not only protects the paint but also increases durability.
6. Add Hooks and Hardware
Drill pilot holes for your screw eyes, then attach the split rings and treble hooks. Ensure everything is securely fastened. Loose hardware can lead to lost fish and broken gear.
7. Test and Tweak
Test your lure in a tub, pool, or calm body of water. Check how it swims and behaves under different retrieval speeds. You may need to sand certain areas, adjust the weight placement, or modify the bill to get the desired action.
Final Thoughts
Handmade lures can outperform commercial options if tuned correctly. They allow for personal expression and customization while being an effective tool in your tackle box. With practice, you’ll not only improve your craft but also increase your chances of landing that big catch. Plus, it’s hard to beat the thrill of fooling a fish with a lure you made yourself.